Getting started
Requirements
The analysis code relies on processing on a GPU. Therefore, a graphics card with Nvidia drivers is required for running the code. We tested the code on Linux and Windows.
Get ready
Setup your Python Environment
Make sure you have Python and Anaconda or Miniconda installed on your system.
Download the code from Github
Next, please make sure you have Git already installed installed on your system. For a user-friendly experience, GitHub Desktop is a nice software tool.
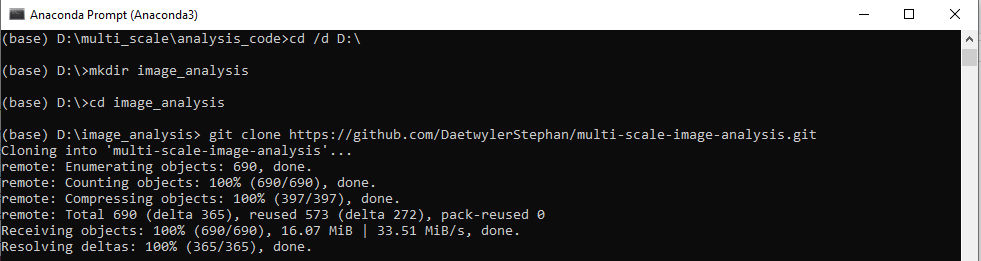
Next, create a folder and go to this folder. Clone this repository to your local path, e.g. in the Anaconda Prompt.
(base) C:\Users\Username\Code> $ git clone https://github.com/DaetwylerStephan/multi-scale-image-analysis.git
Software installation
Create and activate a Python environment called imageanalysis_env
(base) MyComputer ~ $ conda create -n imageanalysis_env python=3.9 cudatoolkit=11.8.* cudnn==8.* -c anaconda
Note: This environment uses Python version 3.9 and sets the cuda tool kits for GPU-based computation.
Next, activate the environment:
(base) MyComputer ~ $ conda activate imageanalysis_env
Installation of the packages
Now navigate to the folder “multiScaleAnalysis”, where the setup.py and requirements.txt file are located, and install the packages:
(imageanalysis_env) MyComputer ~$ cd multi-scale-image-analysis
(imageanalysis_env) MyComputer ~/multiScaleAnalysis $ pip install .
Now you can start executing the scripts and test them using the testdata provided on Synapse or Zenodo (see below).
Running and editing functions with PyCharm
After establishing the Conda environment and installing all functions with “pip install .” in the Anaconda prompt, open your favorite IDE to modify and run code. Here, we use PyCharm.
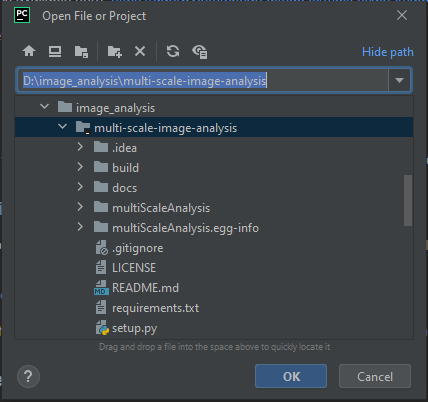
First open your folder as project in PyCharm in File>Open…
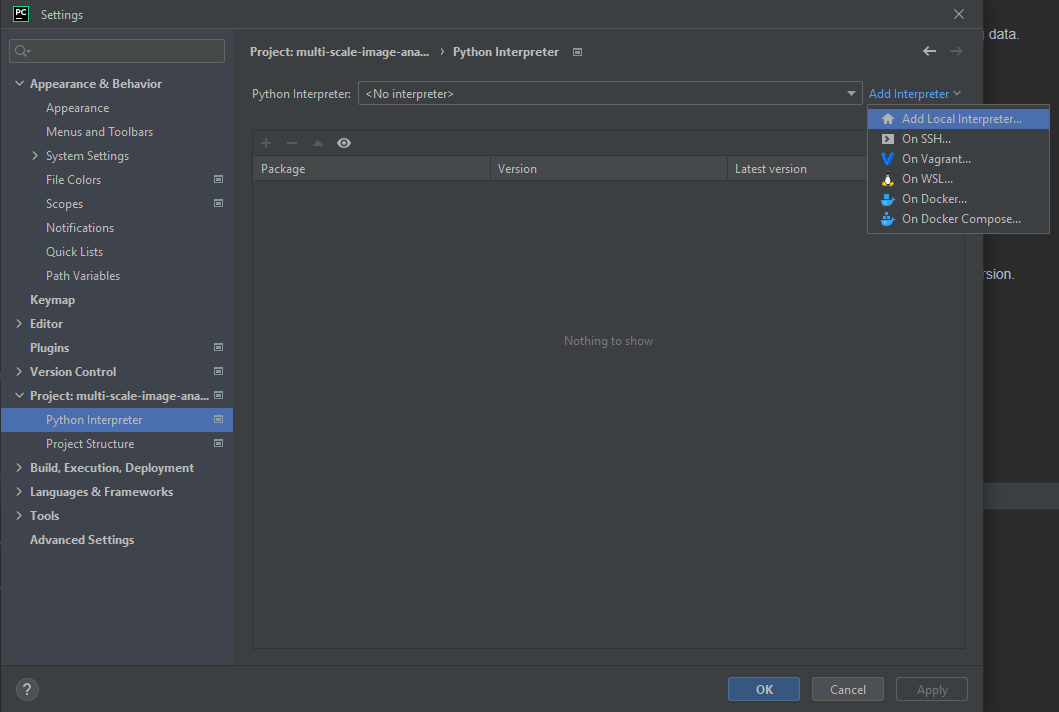
Next, we want to add the environment to our project. For this go to File>Settings… and choose your recently established Conda environment.
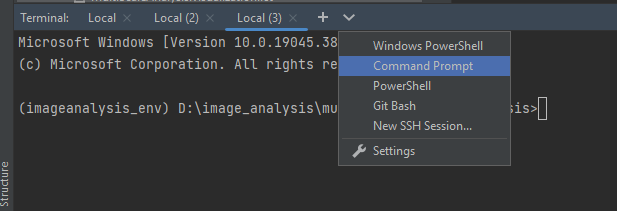
and next

Now the Terminal is ready for input:
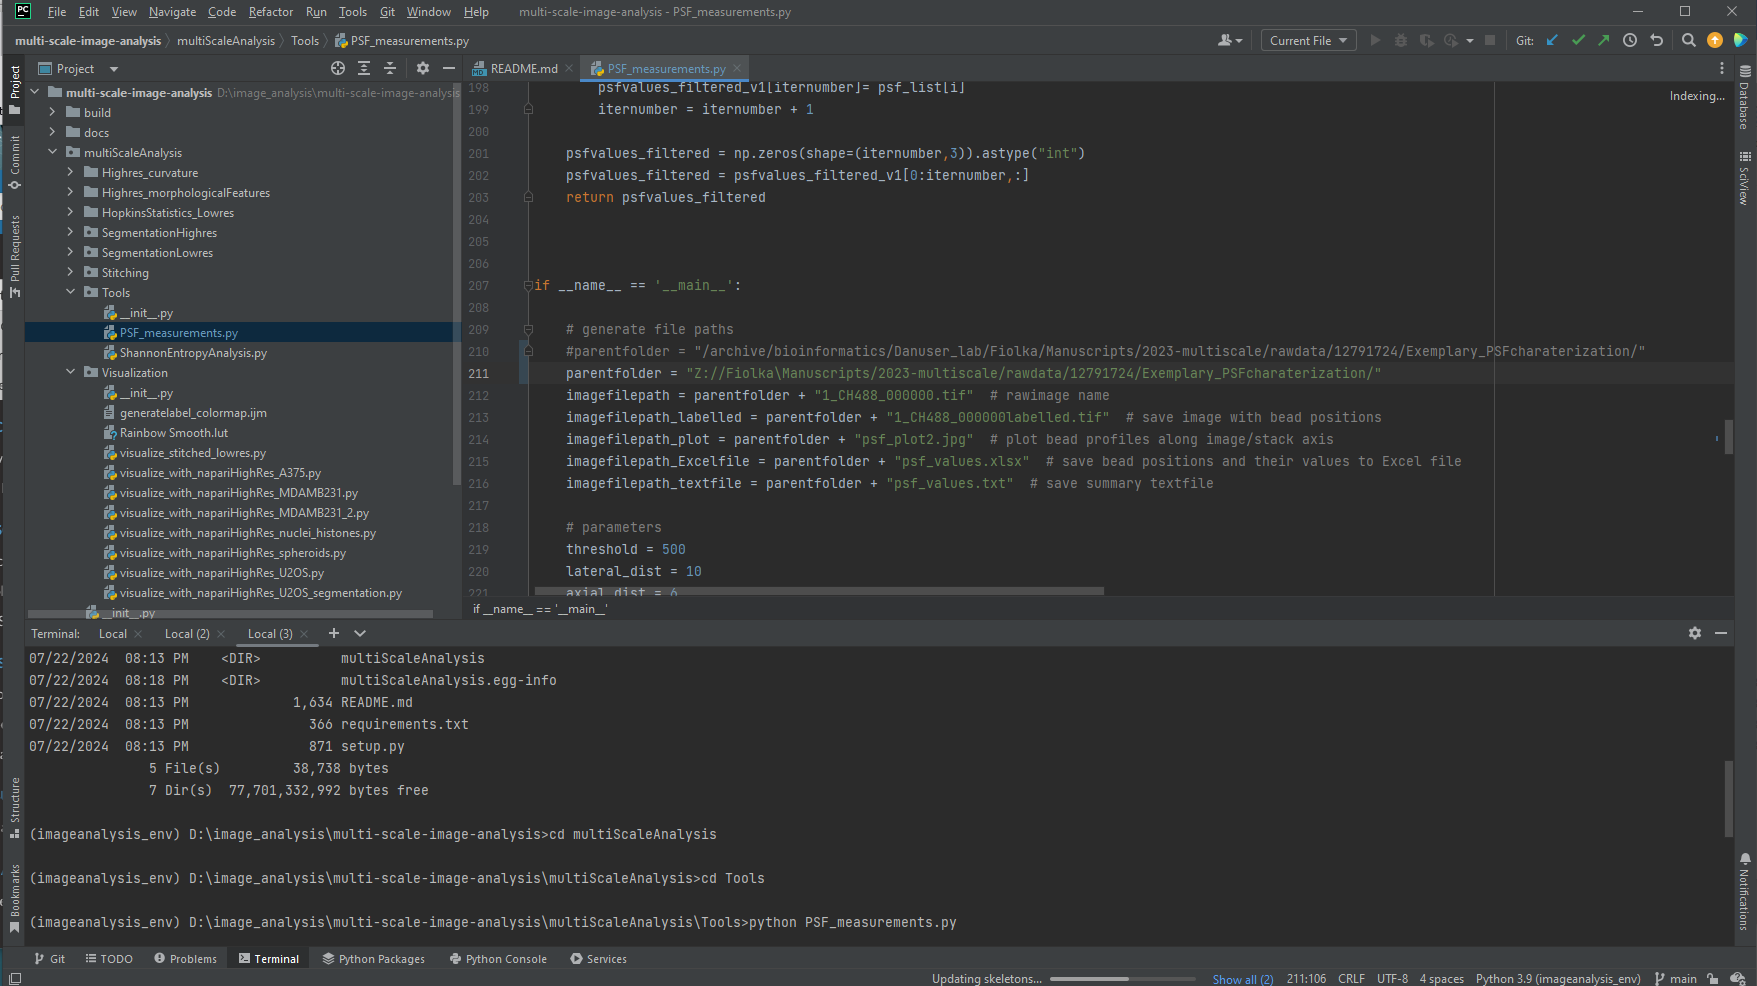
Before running the script, we need to indicate where the data to process is saved. Please check out the different sections for different scripts. For example, in the script to run PSF analysis, modify the parentfolder filepath.
To run the script, we need to go to the folder with the python function and enter “python PSF_measurements.py”:
(imageanalysis_env) MyComputer ~/multiScaleAnalysis $ cd Tools
(imageanalysis_env) MyComputer ~/multiScaleAnalysis $ python PSF_measurements.py
Test data location
Data to test our code is available on
The raw data for all our analysis (several TBs) is available on Synapse, the official storage of National Institute of Health, MC2 centers:
- Experiment Collection:
- Code Example Datasets Collection:
If you are interested in it, please check out: https://help.synapse.org/docs/Getting-Started.2055471150.html
Troubleshooting
If you run the code at an institution with a firewall, you may need to change the proxy
settings to enable pip and conda to download files.
To do so, change your system environment variables (Windows). You obtain the port number (1234) and proxy address (http://proxy.your_university.edu) from your system administrators.
Variable = HTTP_PROXY; Value = http://proxy.your_university.edu:1234
Variable = HTTPS_PROXY; Value = https://proxy.your_university.edu:1234
If you continue to have issues then change the value of Variable HTTPS_PROXY to http://proxy.your_university.edu:1234
If this does not resolve your download/proxy issues, also update the configuration files for conda and pip to include the proxy settings. For Windows, the paths are saved at:
The
condaconfiguration file can be found at C:\Users\UserProfile\.condarcThe
pipconfiguration file can be found at C:\Users\UserProfile\pip\pip.ini
See also this Stackoverflow discussion.
Alternatively, set the proxy from Anaconda Prompt as follows:
set https_proxy=http://username:password@proxy.your_university.edu:1234set http_proxy=http://username:password@proxy.your_university.edu:1234